Lime for Image Classification
You can not come to conclusion based only on numerical features. LIME helps to overcome this issue and gives you explanation about your AI model.

Although nowadays, most companies have shifted to machine and deep learning, for solving the world problems, unfortunately still, most of the models are black boxes. Black box models are mysterious stuff whose internal working are non-interpretable.
It won't be easy to trust an AI, when AI is replacing doctors and medical practitioners for performing surgeries. Would you be able to trust the AI Robot performing your eye surgery, even after knowing the model is 98% accurate? Or would you trust a doctor who has conducted 1000 surgeries, of which 950 were successful(i.e., 95%) accuracy? Most of us would rather have surgery by doctor itself than the robot. Why? We cannot trust someone based on numerical values. Right?
Then, How to Trust AI models?
Lime Comes into Picture Here
Photo by Darius Bashar / Unsplash
The sole purpose of Lime is to explain the predictions of black-box AI models. And by AI models I mean Image, Text, classification, and regression models. If we are given the prediction of any AI model, Lime will explain why the model is making such predictions, using feature extractions. With the use of Lime, the fairness and accountability of the model can be explained. Remember the Doctor vs. Robot example?
" Robot won't take accountability when something goes wrong, but doctors do."
Let's Do Some Hands-On with our Favorite Python!
Beware!! Some serious magic's on the way!!!
Abracadabra!!!
import numpy as np
from PIL import Image
import pandas as pd
from skimage.segmentation import mark_boundaries
Some prerequisites that are needed to import before the magic. Consider it as a hammer that Thor needs to throw electric current.
def show_image(array: np.ndarray) -> Image:
    return Image.fromarray(np.uint8(array))

def show_segments(image: np.ndarray, segment_mask: np.ndarray) -> Image:
    return show_image(255 * mark_boundaries(image, segment_mask))
Load the Image, convert them into an array, then segment the Image with boundaries between labeled regions highlighted. Ok, I know it isn't very easy. I don't want to lose your interest here. Hold on!! I can explain better, They say a picture is worth a thousand words; let's test that out.

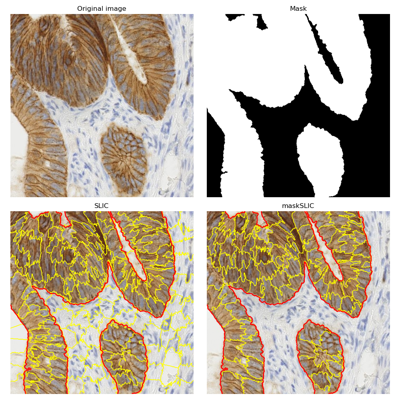
The mark_boundaries technique produces an image with highlighted borders between labeled areas, where the pictures are segmented.
I guess, now the purpose of mark_boundaries is coherent to everyone, right?
full_image = Image.open("coffee.jpg")
full_image

image = full_image.resize((224,224))
image = np.array(image)
image.shape

# Load an Image Classification Model
from tensorflow.keras.applications.mobilenet_v2 import (
    MobileNetV2, preprocess_input, decode_predictions
)
model = MobileNetV2()

# Create a predict_fn
def predict_fn(image):
    return model.predict(preprocess_input(image))
The main catch here is that we cannot directly feed the inbuilt 'model.predict()' function inside LIME, therefore creation of a separate predict function is a must-have for LIME with class type 'function' rather than having class type 'method.' These are the details which are pretty hard to find for someone who focuses mostly on writing (theoretical) stuff than doing coding and development itself.
np.argmax(prediction,axis=1)array([967], dtype=int64)
numpy's argmax will give the maximum argument value from the entire range of prediction. Meaning which value has got maximum (numerical) value and what is the index for that class.
decode_predictions(prediction)[[('n07920052', 'espresso', 0.76412565),
('n07930864', 'cup', 0.042750545),
('n07932039', 'eggnog', 0.024166716),
('n07875152', 'potpie', 0.0071868617),
('n03063599', 'coffee_mug', 0.0069986456)]]
OK!! We've got index, Mr. Developer. That's super cool, But How about the actual classes and their score?
That's where the above 'decode_predictions' method comes into the picture. It gives all the value of classes and predictions our model gave to them.
from tensorflow.keras.applications.mobilenet import decode_predictions
decode_predictions(prediction, top=1)
[[('n07920052', 'espresso', 0.76412565)]]
This step is similar to the above one. Now we are seeing only one value, but the senior folks told us to make it intuitive and straightforward for you people, so here I am nodding my head for yes and writing the code for you guys!!
Enough of Deep Learning, Tensorflow, and Preprocessing
Let's begin demystifying our Black Box model with LIME
from visualime.explain import explain_classification, render_explanation
segment_mask, segment_weights = explain_classification(image=image, predict_fn=predict_fn, num_of_samples=128)
VisuaLIME is an implementation of LIME focused on producing visual local explanations for image classifiers created as part of the XAI Demonstrator project.
VisuaLIME provides two functions that package its building blocks into a reference explanation pipeline: explain_classification and render_explaination. explain_classification requires the Image in which prediction is made, the prediction values, and the number of samples to consider. A number of samples are the size of the neighborhood to learn the linear model.
render_explanation(image, segment_mask, segment_weights, positive="green", negative="red", coverage=0.05)

This green and red thing on the Image looks fascinating, but how do I interpret this?
The green color here means what stuff the classifier model looks like to predict the original value(espresso) in our case. And red spread means the stuff that contributes towards the negative prediction of the model. Meaning, that pushes our model to not say (or predict) it as espresso. And green color is prioritizing our model to predict it as espresso.
The magic comes to conclusion now. Now you all know the secret of this magic and are magicians on your own!
One such magical product that offers explainability is AIEnsured by TestAIng.

References:
2. https://lime-ml.readthedocs.io/en/latest/lime.html
3. https://pypi.org/project/visualime/#data
Do Checkout:
- Interested to know more about Audio model? Here's the link
2. If Text Data fascinates you then click here
3. Remember I told you about LIME can also be used for Text? Check that out here

